
The sizzle of a golden egg roll hitting hot oil, that first bite where juicy cheeseburger filling meets crunchy wrapper—now that’s what I call dinner magic. I’ll never forget the first time I whipped up these cheeseburger egg rolls on a hectic weeknight. The kitchen smelled like a burger joint, but the crunch was pure takeout joy. Honestly, these are one of those recipes you’ll make once and immediately want to brag about. If you’re craving something fun, fast, and totally satisfying, this cheeseburger egg rolls recipe is about to become your weeknight MVP.
My love affair with cheeseburger egg rolls started when I was hunting for a dinner that would excite both the grown-ups and the kids (let’s face it, kids are picky!). The classic cheeseburger flavors—think beef, onions, pickles, and gooey cheese—all rolled up in a crispy shell, make these egg rolls irresistible. I’ve tested this recipe more times than I can count, tweaking the seasoning and the wrapper technique so you don’t have to stress. You can pull this off in about 30 minutes, start to finish, and I promise, your crew won’t leave a crumb behind.
These cheeseburger egg rolls are perfect for busy families, picky eaters, or anyone who loves a good appetizer-turned-main. They’re packed with protein, full of flavor, and, with the right dipping sauce, basically turn any night into a party. Whether you’re meal prepping, hosting game night, or just want something different for dinner, you’ll love this recipe for its speed, taste, and pure crowd-pleasing power. Trust me, after a dozen batches, I can say with confidence—these are the ultimate cheeseburger egg rolls for dinner or any occasion.
Why You’ll Love This Recipe
- Quick & Easy: Ready in 30 minutes, so you can whip them up after work or school without breaking a sweat.
- Simple Ingredients: No fancy grocery runs—just ground beef, cheese, pickles, and a few pantry staples.
- Perfect for Any Occasion: Whether you’re planning a game-day spread, a cozy family movie night, or a fun dinner party, these cheeseburger egg rolls fit right in.
- Crowd-Pleaser: Picky kids, burger lovers, and appetizer fans all rave about them. Trust me, there are never leftovers.
- Unbelievably Delicious: The crispy wrapper and juicy, cheesy filling hit every comfort food craving (and then some!).
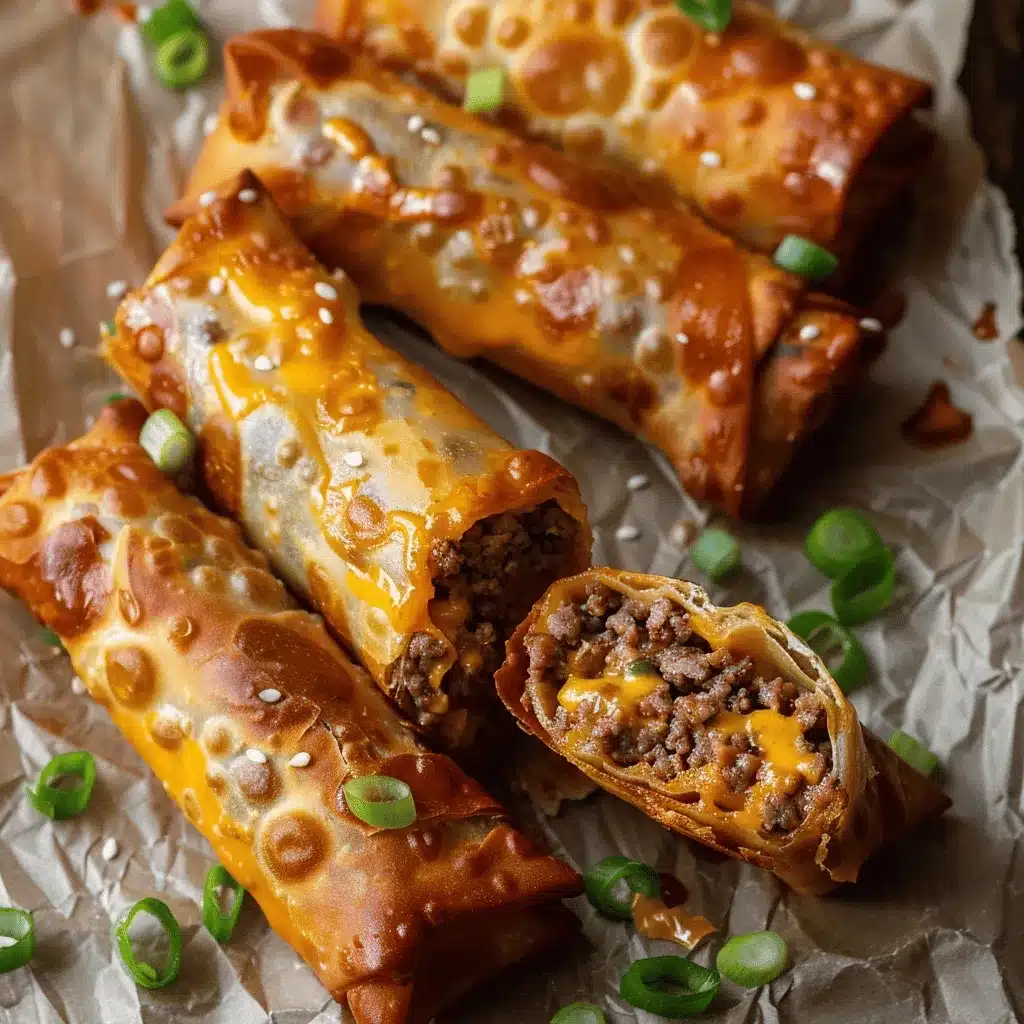
What really sets this cheeseburger egg rolls recipe apart is how the classic burger taste is delivered in a brand-new way. I blend the beef with diced pickles, onions, and the perfect amount of seasoning before mixing in melty cheddar. The real trick? Wrapping them tightly so you get that iconic crunch without any greasy mess. This isn’t just another Pinterest hack—after countless tries, I’ve nailed the texture and flavor so you get a juicy, savory filling in every bite.
There’s something special about biting into one of these egg rolls. You get all the nostalgia of a backyard burger, but with a crispy, finger-food twist. Plus, you can prep the filling ahead, making them the ultimate stress-free dinner. Whether you’re looking to impress guests or shake up your weeknight routine, this recipe brings the wow factor—without the fuss.
Ingredients Needed
This cheeseburger egg rolls recipe is all about simple, bold ingredients that come together for maximum flavor. I love how these are mostly pantry and fridge staples—nothing fancy, just the good stuff that makes a cheeseburger shine.
- Ground beef (1 lb / 450 g, 80-85% lean): Juicy and flavorful, the base of every great cheeseburger. I usually go for 85% lean for the perfect balance (not too greasy, not too dry).
- Yellow onion (1 small, finely diced): Brings that classic “burger joint” aroma and a hint of sweetness.
- Dill pickles (1/3 cup / 50 g, finely chopped): For a tangy, briny kick that’s absolutely essential. You can use bread-and-butter pickles for a sweeter twist.
- Cheddar cheese (1 cup / 100 g, shredded): Sharp cheddar melts beautifully and gives you that ooey-gooey pull. I’ve tried mozzarella for a milder flavor—still good but not quite as punchy.
- Ketchup (2 tbsp / 30 ml): Adds a hint of sweetness and ties all the flavors together.
- Yellow mustard (1 tbsp / 15 ml): For that unmistakable burger tang.
- Worcestershire sauce (1 tsp / 5 ml): Deepens the savory flavor—don’t skip it if you want that “umami” experience.
- Salt & pepper (1/2 tsp / 2 g each, or to taste): Season to your liking. I always taste the filling before wrapping.
- Egg roll wrappers (16 sheets, 6-inch/15cm square): Find these in the refrigerated produce section. Spring roll wrappers don’t work as well—they’re thinner and get soggy.
- Egg (1, beaten): For sealing the rolls so they don’t burst open while frying.
- Vegetable oil (for frying, about 3 cups / 700 ml): Any neutral oil works—canola or peanut oil are my go-tos.
If you want to switch things up, try using ground turkey for a leaner option, or swap cheddar for pepper jack if you like a little heat. For gluten-free, use gluten-free egg roll wrappers (a bit harder to find, but worth the search!).
Don’t forget the dipping sauce! I love a simple mix of mayo, ketchup, and a dash of hot sauce for the perfect cheeseburger vibe. And if you’re feeling extra, sprinkle some sesame seeds on top after frying—they look cute and give a subtle nod to burger buns.
Equipment Needed
- Large skillet or frying pan: For browning the beef and onions. I prefer a nonstick, but stainless works fine too.
- Mixing bowl: To combine the filling ingredients. If you’re doubling the recipe, use a big one!
- Cutting board & sharp knife: For dicing onions and pickles. The sharper the knife, the less you’ll cry over onions.
- Grater (optional): If you’re shredding cheese from a block—always fresher than pre-shredded.
- Pastry brush or small spoon: For brushing egg wash onto the wrappers.
- Deep frying pan or Dutch oven: For frying the egg rolls. A heavy-bottomed pot helps keep the oil temp steady.
- Slotted spoon or spider: For lifting egg rolls out of the oil safely.
- Paper towels & cooling rack: To drain excess oil and keep the rolls crispy.
- Instant-read thermometer (optional): Helps keep oil at the perfect frying temp—around 350°F (175°C). If you don’t have one, just test with a scrap of wrapper.
Don’t stress if you don’t have a deep fryer—pan frying works great. I’ve used a heavy cast iron skillet in a pinch, and it holds heat beautifully. Just remember to never crowd the pan, and always keep the oil clean between batches. And if you’re short on utensils, tongs can work for flipping, but be gentle!
Preparation Method
- Brown the beef and onions (7 minutes):
Heat your large skillet over medium-high heat. Add ground beef and diced onion. Cook, breaking up the beef, until browned and onions are soft (about 6-7 minutes). If there’s extra grease, drain most of it off—but leave a little for flavor.
Tip: The beef should be crumbly but not dry. If it starts to stick, add a splash of water. - Add flavorings (2 minutes):
Stir in chopped pickles, ketchup, mustard, Worcestershire sauce, salt, and pepper. Cook for another 1-2 minutes until everything is well mixed and fragrant.
Note: Taste the filling now and tweak the seasoning if needed. Sometimes I add a pinch more mustard. - Mix in cheese (1 minute):
Remove the skillet from heat. Sprinkle the shredded cheddar over the warm beef mixture. Stir until the cheese melts and the filling is gooey. Let it cool for 5 minutes so it’s easier to handle.
Warning: Too hot, and the cheese will run everywhere when you wrap! - Assemble the egg rolls (10 minutes):
Lay an egg roll wrapper on a clean surface, one corner facing you (like a diamond). Scoop 2 heaping tablespoons (about 30g) of filling near the bottom corner. Fold up the bottom, tuck in the sides, and roll tightly. Brush the top edge with beaten egg before sealing.
Tip: Don’t overfill—too much, and they’ll burst! - Heat the oil (5 minutes):
Pour vegetable oil into your deep frying pan or Dutch oven to about 2 inches (5 cm) deep. Heat to 350°F (175°C). If you don’t have a thermometer, drop in a scrap of wrapper—if it sizzles, you’re good. - Fry the egg rolls (6-8 minutes):
Working in batches, fry egg rolls seam-side down for 2-3 minutes per side, or until deep golden brown. Turn with a slotted spoon or tongs. Transfer to a cooling rack or paper towels to drain.
Tip: If the oil gets too hot, the wrappers burn before the inside heats through. Lower the heat if needed. - Serve (immediately):
Let cool for a few minutes before serving—they’ll be piping hot inside. Serve with your favorite dipping sauce.
Sometimes, the first batch is a test run. If a roll opens up, it’s usually because the wrapper wasn’t sealed well or you overfilled it. Don’t worry—it happens to the best of us! Just pinch it shut and soldier on. And if you want to bake instead of fry, brush each roll with a little oil, bake at 425°F (220°C) for about 12-15 minutes, flipping halfway, until crispy and golden.
Cooking Tips & Techniques
- Don’t rush the filling: Letting it cool before wrapping makes a world of difference. Hot filling can steam the wrapper and make it soggy (learned that one the hard way!).
- Tight roll, tight seal: Roll the wrappers snugly, and always seal the edge with egg wash. Any gaps can let oil seep in or filling spill out.
- Fry in batches: Overcrowding the pan drops the oil temp, making soggy egg rolls. Stick to 4-5 at a time, max.
- Keep oil at the right temp: Too cool and your rolls absorb oil. Too hot, and they burn outside while staying cold inside. If you see smoke, turn it down!
- Draining is key: Place fried egg rolls on a wire rack over paper towels. This prevents steam from making the bottoms soggy (I used to just pile them on paper towels—big mistake!).
- Multitask smartly: While the oil heats, assemble your next batch. It keeps things moving and dinner on track.
- Use leftovers wisely: If you have extra filling, it’s amazing in a grilled cheese or mixed into scrambled eggs the next morning.
I’ve found that patience pays off here. My first tries were a little messy, but now, it’s almost automatic. Don’t be discouraged if a few rolls aren’t picture-perfect—the taste is what matters! And if you’re really short on time, prepping the filling ahead is a real lifesaver. Just keep it chilled, then wrap and fry when you’re ready for dinner magic.
Variations & Adaptations
- Low-Carb/Keto: Swap regular wrappers for low-carb egg roll wrappers (available at some health food stores) or even use large cabbage leaves, steamed until pliable, for a lighter bite.
- Cheeseburger Deluxe: Add cooked bacon bits, sautéed mushrooms, or a dash of hot sauce to the filling for extra flavor.
- Vegetarian: Use plant-based ground beef and vegan cheese. The flavor is surprisingly close—my vegetarian friends give this version a big thumbs-up!
- Gluten-Free: Opt for gluten-free egg roll wrappers, or rice paper for a different texture. Just soak rice papers briefly and wrap carefully.
- Seasonal Twist: In summer, add chopped fresh tomatoes or swap pickles for pickled jalapeños for a spicy kick.
One of my favorite riffs is to add a spoonful of sautéed jalapeños and pepper jack cheese for a “spicy cheeseburger” vibe. I’ve also tossed in chopped spinach for a sneaky veggie boost. You can easily tweak the seasoning—sometimes I’ll stir in a little smoked paprika or garlic powder for a deeper flavor. Don’t be afraid to experiment—this recipe is super forgiving!
Serving & Storage Suggestions
Serve these cheeseburger egg rolls hot and crispy, ideally within 10 minutes of frying. Pile them high on a platter with a bowl of “special sauce” (mayo, ketchup, dash of hot sauce) or classic burger condiments like mustard and relish.
They pair perfectly with a simple green salad or classic French fries for a diner-style meal. For parties, cut the egg rolls in half (on the diagonal—they look so cute that way!) and serve with toothpicks for dipping.
Leftover egg rolls? Cool them completely, then store in an airtight container in the fridge for up to 3 days. For best results, reheat in the oven or air fryer at 350°F (175°C) for 5-7 minutes to reclaim that crispy shell. Avoid microwaving if you want to keep the crunch. You can also freeze uncooked, assembled egg rolls—just thaw and fry when hunger hits.
One thing I’ve noticed: the flavors get even deeper after a day in the fridge, so don’t be shy about making a double batch for tomorrow’s lunch!
Nutritional Information & Benefits
Each cheeseburger egg roll (based on a batch of 16) comes in around 170 calories, 9g protein, 10g fat, and 11g carbs. They’re a great source of protein from beef and cheese, and you can lighten things up by swapping in leaner ground meat or using reduced-fat cheese.
If you’re watching carbs, try a low-carb wrapper or even lettuce leaves. Allergens to note: contains gluten, dairy, and egg. For gluten- or dairy-free, just swap the wrappers and cheese accordingly.
I love that this recipe can be tailored for wellness goals—add more veggies to the filling, use baked instead of fried, or keep portions in check for a balanced, joyful meal.
Conclusion
If you’re searching for a dinner that’s fun, flavorful, and guaranteed to win over even the pickiest eaters, you need to try this cheeseburger egg rolls recipe. It’s got all the cheeseburger comfort you crave, wrapped up in a crispy, golden shell that’s pure joy to eat. I love how versatile and forgiving this recipe is—perfect for busy nights, casual parties, or just changing up your dinner routine.
Don’t be afraid to make it your own—mix up the filling, try a new cheese, or bake instead of fry. Every batch I make reminds me of why I keep coming back to this recipe: it’s fun, it’s fast, and it always makes people smile. I’d love to hear how your cheeseburger egg rolls turn out—share your tweaks, tips, and photos in the comments below, and don’t forget to pin this recipe for your next dinner inspiration!
Happy cooking, and remember—sometimes the best dinners start with a little crunch and a lot of cheese. Enjoy!
Frequently Asked Questions
Can I bake cheeseburger egg rolls instead of frying?
Absolutely! Brush each roll lightly with oil and bake at 425°F (220°C) for 12-15 minutes, flipping halfway through. They’ll be golden and crisp, just a bit less crunchy than fried.
What dipping sauce goes best with cheeseburger egg rolls?
Classic burger sauces like a mix of mayo, ketchup, and hot sauce work perfectly. Ranch, honey mustard, or even barbecue sauce are also great choices.
Can I make these cheeseburger egg rolls ahead of time?
Yes! You can prepare the filling and assemble the egg rolls up to a day ahead. Store them uncooked in the fridge, covered tightly, and fry or bake just before serving.
How do I keep the egg rolls crispy if I’m making a big batch?
Place cooked egg rolls on a wire rack set over a baking sheet in a low oven (200°F/95°C) to keep them warm and crisp while you finish the rest.
Can I freeze cheeseburger egg rolls?
Yes, you can freeze uncooked, assembled egg rolls. Place them on a baking sheet to freeze individually, then transfer to a freezer bag. Fry or bake from frozen, adding a few extra minutes to the cooking time.
Pin This Recipe!
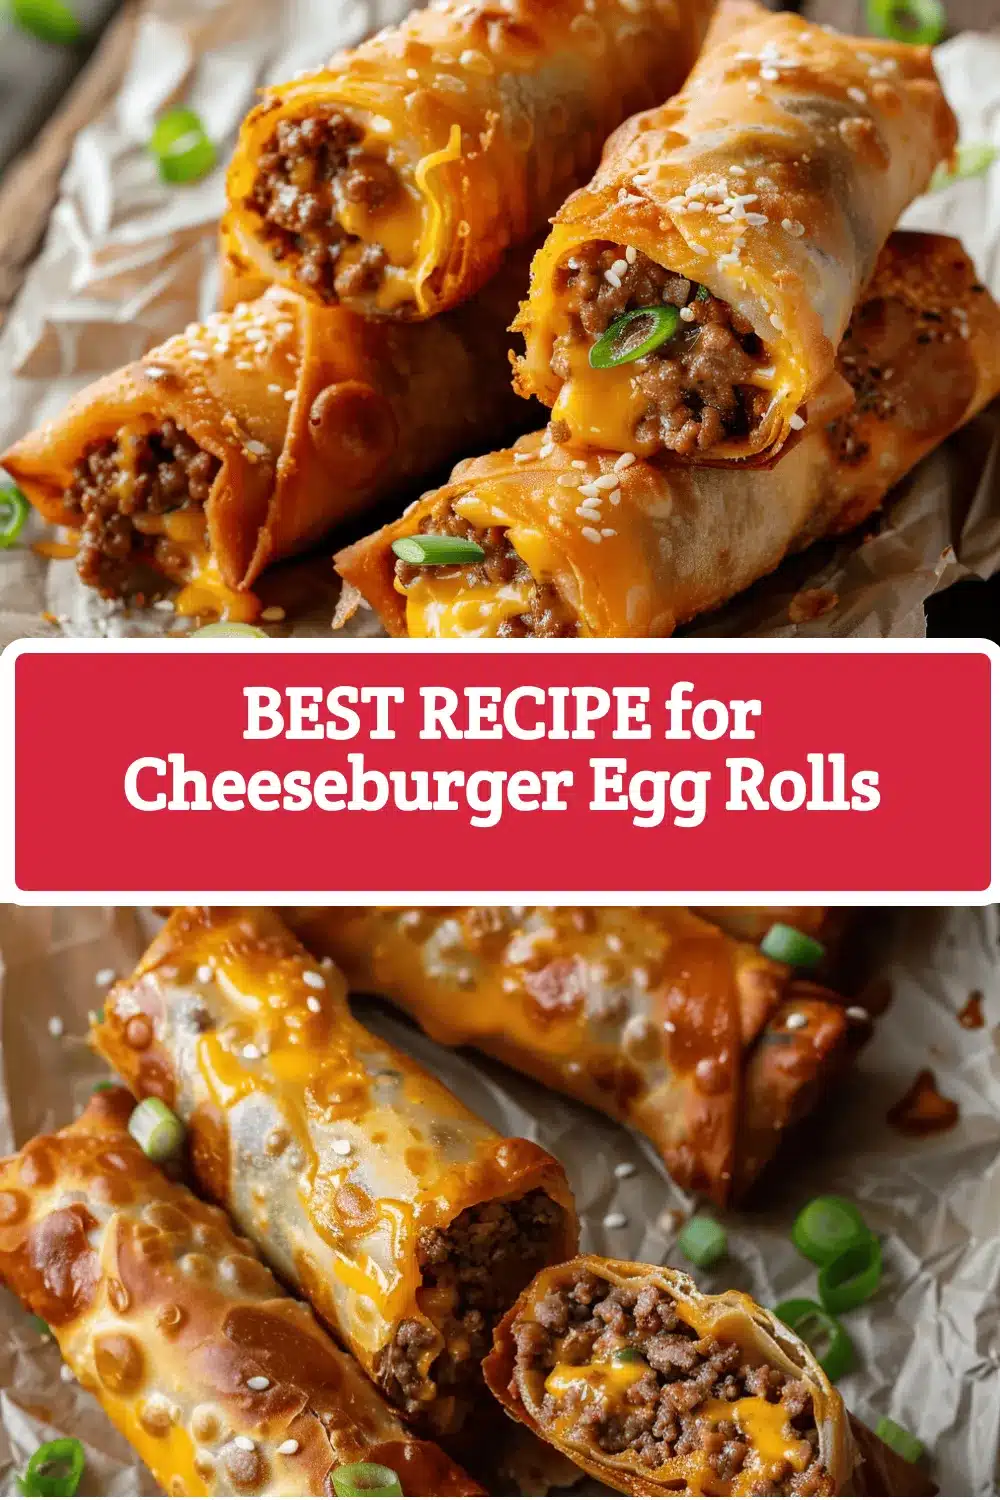

Cheeseburger Egg Rolls
- Total Time: 30 minutes
- Yield: 16 egg rolls (about 4–6 servings) 1x
Description
These Cheeseburger Egg Rolls combine all the classic flavors of a juicy cheeseburger—beef, onions, pickles, and cheddar—wrapped in a crispy, golden shell. Ready in just 30 minutes, they’re perfect for busy weeknights, parties, or whenever you crave a fun, crowd-pleasing dinner.
Ingredients
- 1 lb ground beef (80-85% lean)
- 1 small yellow onion, finely diced
- 1/3 cup dill pickles, finely chopped
- 1 cup shredded cheddar cheese
- 2 tablespoons ketchup
- 1 tablespoon yellow mustard
- 1 teaspoon Worcestershire sauce
- 1/2 teaspoon salt, or to taste
- 1/2 teaspoon black pepper, or to taste
- 16 egg roll wrappers (6-inch square)
- 1 egg, beaten (for sealing)
- Vegetable oil, for frying (about 3 cups)
Instructions
- Heat a large skillet over medium-high heat. Add ground beef and diced onion. Cook, breaking up the beef, until browned and onions are soft, about 6-7 minutes. Drain most of the grease, leaving a little for flavor.
- Stir in chopped pickles, ketchup, mustard, Worcestershire sauce, salt, and pepper. Cook for another 1-2 minutes until well mixed and fragrant. Taste and adjust seasoning if needed.
- Remove skillet from heat. Sprinkle shredded cheddar over the warm beef mixture and stir until the cheese melts. Let the filling cool for 5 minutes.
- Lay an egg roll wrapper on a clean surface with one corner facing you. Place 2 heaping tablespoons of filling near the bottom corner. Fold up the bottom, tuck in the sides, and roll tightly. Brush the top edge with beaten egg to seal. Repeat with remaining wrappers and filling.
- Pour vegetable oil into a deep frying pan or Dutch oven to about 2 inches deep. Heat to 350°F (175°C).
- Working in batches, fry egg rolls seam-side down for 2-3 minutes per side, or until deep golden brown. Turn with a slotted spoon or tongs. Transfer to a cooling rack or paper towels to drain.
- Let cool for a few minutes before serving. Serve hot with your favorite dipping sauce.
Notes
Let the filling cool before wrapping to prevent soggy wrappers. Roll tightly and seal well with egg wash to avoid bursting. Fry in batches to maintain oil temperature and crispiness. For a lighter version, bake at 425°F for 12-15 minutes, flipping halfway. Leftover filling is great in grilled cheese or scrambled eggs.
- Prep Time: 15 minutes
- Cook Time: 15 minutes
- Category: Main Course
- Cuisine: American
Nutrition
- Serving Size: 1 egg roll
- Calories: 170
- Sugar: 1
- Sodium: 350
- Fat: 10
- Saturated Fat: 4
- Carbohydrates: 11
- Fiber: 1
- Protein: 9
Keywords: cheeseburger egg rolls, easy dinner, appetizer, ground beef, kid friendly, party food, crispy, quick recipe, American, finger food


