
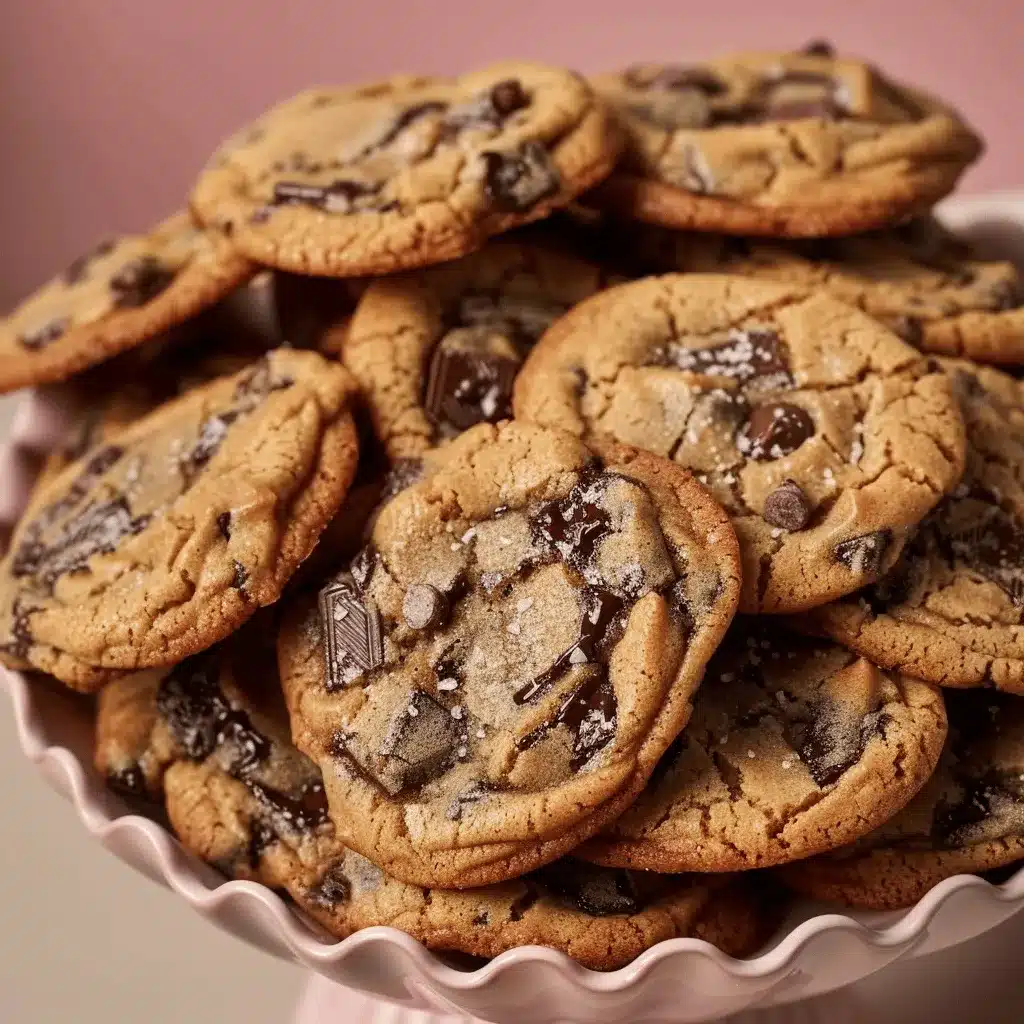
The first time I pulled a tray of these chewy rippled chocolate chip cookies from the oven, the aroma was so good my neighbor knocked just to ask what was baking. Gooey centers, golden crispy edges, and those magical little ripples all over—honestly, it’s the kind of homemade cookie that makes you want to eat them straight off the sheet, no cooling rack required. If you love a cookie that’s thick but not cakey, chewy but not dense, and studded with melty chocolate pools, you’re in for a treat.
I discovered the secret to the ripples during a late-night baking session—let’s just say I was out of patience and started banging the pan mid-bake (more on that soon). It’s become my signature move. Over the years, I’ve tweaked the recipe for perfect chewiness, so now every bite delivers that satisfying contrast: crispy, rippled edges and a soft, chocolate-packed center.
These chewy rippled chocolate chip cookies are great for bake sales, after-school snacks, or any time you need something sweet and impressive (without fancy ingredients or complicated steps). Whether you’ve never baked cookies from scratch or you’re a seasoned baker on the hunt for your “perfect” chocolate chip cookie, this recipe is for you. I’ve made these dozens of times, and every single batch disappears fast. So, grab your apron—let’s make the best chewy rippled chocolate chip cookies you’ve ever tasted!
Why You’ll Love This Recipe
- Quick & Easy: These chewy rippled chocolate chip cookies come together in about 30 minutes, making them perfect for last-minute cravings or unexpected guests.
- Simple Ingredients: Nothing fancy here—just pantry staples and your favorite chocolate chips.
- Perfect for Any Occasion: Whether it’s a family movie night, a holiday tray, or a sweet gift for friends, these cookies fit right in.
- Crowd-Pleaser: Picky eaters, chocolate lovers, and even folks who claim they’re “not into sweets” can’t stop at one.
- Unbelievably Delicious: The rippled edges are crispy, the centers chewy, and the chocolate is gooey—cookie bliss, honestly.
What sets these chewy rippled chocolate chip cookies apart? It’s all about the ripple method—pan-banging during baking. This creates those iconic ridges and a unique, chewy texture you just can’t get with regular cookies. Plus, a touch of brown sugar and a chill in the fridge (even just 15 minutes!) gives you a depth of flavor and the right amount of spread.
This isn’t just a copycat recipe—it’s the one I bake for birthdays, family get-togethers, and “just because” days. You get that classic taste, but with a little wow-factor and a chewy bite that keeps everyone grabbing for more. If you’re after comfort food that makes you smile and brings people together, these cookies are it. Trust me, one batch and you’ll be hooked!
Ingredients Needed
This recipe uses classic ingredients, but a few little tricks make a big difference. Here’s everything you need to whip up a batch of chewy rippled chocolate chip cookies:
- All-Purpose Flour (2 cups / 250g): The base—just plain flour works great, but you can use a 1:1 gluten-free blend if needed.
- Baking Soda (1 tsp / 5g): For just the right lift and those beautiful ripples.
- Kosher Salt (1/2 tsp / 3g): Don’t skip this—it balances the sweetness and brings out the chocolate flavor.
- Unsalted Butter (3/4 cup / 170g, room temp): I love using European-style butter for extra richness, but any good unsalted butter will work. Soften it for easy mixing.
- Brown Sugar (1 cup / 200g, packed): For chewy texture and a caramel-like depth. I prefer dark brown sugar, but light brown is fine.
- Granulated Sugar (1/2 cup / 100g): Adds just the right amount of sweetness and crisp edges.
- Large Egg (1, room temp): Helps bind everything together and adds moisture.
- Vanilla Extract (2 tsp / 10ml): Pure vanilla gives the best flavor, but imitation works in a pinch.
- Semi-Sweet Chocolate Chips (1 1/2 cups / 270g): I’m partial to Ghirardelli or Guittard, but use any brand you love. You can mix in some chocolate chunks for extra melty pockets.
- Optional: Flaky Sea Salt (for sprinkling): Adds a gourmet touch and balances the sweetness—highly recommended!
Ingredient Tips & Substitutions:
- If you want to try whole wheat flour, swap in 1/2 cup for a nuttier flavor (the cookies will be slightly denser).
- Dairy-free? Use vegan butter and dairy-free chocolate chips.
- For extra chew, stir in 2 tsp of molasses with the sugars.
- Love nuts? Add 1/2 cup (60g) chopped toasted walnuts or pecans.
- Mix up the chips: try milk, dark, or even peanut butter chips for a twist.
Most of these ingredients are probably in your pantry already, and the substitutions make it easy to adjust for allergies or dietary preferences. I always keep a stash of high-quality chocolate chips and brown sugar on hand just for this recipe. Trust me, it makes a difference!
Equipment Needed
- Mixing Bowls: At least two—one large for the dough, one smaller for dry ingredients. Stainless steel or glass both work.
- Hand Mixer or Stand Mixer: Speeds up creaming the butter and sugar, but you can use a sturdy whisk and elbow grease if needed.
- Measuring Cups & Spoons: For accuracy—baking is a little bit of science, after all.
- Baking Sheet: Heavy-duty, light-colored sheets promote even baking and those gorgeous ripples. Avoid dark pans—they cook the bottoms too fast.
- Parchment Paper: Keeps cookies from sticking and makes cleanup a breeze. Silicone baking mats work too.
- Cookie Scoop or Large Spoon: For evenly sized cookies. I use a 3-tablespoon (45ml) scoop for bakery-style cookies.
- Cooling Rack: Helps cookies cool evenly and keeps them crisp.
If you don’t have a stand mixer, a hand mixer and a little patience do the trick. In a pinch, I’ve even used a sturdy wooden spoon for mixing. For best results, avoid using warm baking sheets for a new batch—the cookies will spread too much. And for budget-friendly tools, check your local thrift store for sturdy metal baking sheets and cooling racks. I’ve scored some of my favorites that way!
Preparation Method
- Preheat the Oven: Set to 350°F (175°C). Make sure your oven rack is in the center position.
- Line Baking Sheets: Line two large baking sheets with parchment paper or silicone mats. This step keeps the cookies from sticking and helps with even browning.
- Mix Dry Ingredients: In a medium bowl, whisk together 2 cups (250g) flour, 1 tsp (5g) baking soda, and 1/2 tsp (3g) kosher salt. Set aside.
- Cream Butter & Sugars: In a large bowl, beat 3/4 cup (170g) unsalted butter, 1 cup (200g) brown sugar, and 1/2 cup (100g) granulated sugar until light and fluffy (about 2-3 minutes). Use a hand or stand mixer if you have one.
- Add Egg & Vanilla: Beat in 1 large egg and 2 tsp (10ml) vanilla extract on medium speed until fully combined. The mixture should be creamy and smooth.
- Combine Wet & Dry: Gradually add the dry ingredients. Mix on low just until you see no more flour streaks—don’t overmix or cookies get tough.
- Stir in Chocolate Chips: Fold in 1 1/2 cups (270g) chocolate chips (and nuts, if using) with a spatula. The dough will be thick and a little sticky.
- Chill Dough (Optional but Recommended): For thick, chewy cookies, chill dough in the fridge for 15-30 minutes. If you’re impatient (I get it), you can bake right away—they’ll just spread a bit more.
- Scoop Dough: Use a 3-tablespoon (45ml) scoop or large spoon to drop dough balls onto prepared baking sheets, spacing at least 3 inches (7.5cm) apart (these cookies spread!).
- Bake & Ripple: Bake 10-12 minutes, one sheet at a time. At the 8-minute mark, remove the tray and firmly tap it on the counter to create ripples. Return to oven, repeat tapping at 10 minutes if you want extra ridges. Edges should be golden, centers a bit underbaked.
- Cool on Sheet: Let cookies cool on the baking sheet for 5 minutes (they’ll continue cooking a bit and set up).
- Transfer to Rack: Move cookies to a wire rack to finish cooling, or eat warm if you can’t wait—gooey chocolate is the best!
- Sprinkle with Sea Salt: (Optional) While cookies are still warm, sprinkle with flaky sea salt for a bakery-style finish.
Troubleshooting Tips:
- If cookies are spreading too much, chill the dough longer or check your butter wasn’t too warm.
- If they seem puffy, lightly flatten the dough balls before baking.
- Watch for golden edges and a slightly soft center—don’t overbake! They’ll firm up as they cool.
I’ve learned (the hard way) that banging the pan is key to those ripples—don’t be shy, give the tray a good whack. And always use fresh baking soda for the best texture!
Cooking Tips & Techniques
- Pan-Banging for Ripples: The secret to rippled edges is tapping the baking sheet on the counter while the cookies are still baking. Start at 8 minutes, then again at 10 if you like a dramatic ripple. It feels weird at first, but trust me, it works!
- Don’t Overmix: Once you add the dry ingredients, mix just until combined. Overmixing leads to tough cookies (learned this one the hard way—my first batch was basically bread!).
- Chill Your Dough: Even 15 minutes in the fridge gives you thicker, chewier cookies. If you have the patience, let it chill up to 24 hours for max flavor.
- Watch Your Butter: If your butter is too soft (or melted), cookies will spread too much. You want it at cool room temperature—just soft enough to dent with a finger, not greasy.
- Accuracy Matters: Weigh your ingredients for best results. If you don’t have a scale, fluff your flour before measuring to avoid packing it in.
- One Sheet at a Time: For even baking and the best ripples, bake one tray in the center of the oven at a time. Rotating trays can mess with the heat and the spread.
- Multitasking: While one tray bakes, scoop the next batch—no waiting around!
After many batches, I’ve realized that small tweaks (like baking soda freshness or oven rack placement) make a big difference. My biggest mess-up? Forgetting to chill the dough on a hot day—cookie puddles! Don’t skip the chill if you want those bakery-style results.
Variations & Adaptations
- Gluten-Free Version: Swap in a 1:1 gluten-free all-purpose flour blend. I’ve used King Arthur and Cup4Cup with great results—no one could tell the difference!
- Dairy-Free Adaptation: Use vegan butter and dairy-free chocolate chips. The cookies still turn out chewy and delicious.
- Double Chocolate: Replace 1/4 cup (30g) of the flour with unsweetened cocoa powder and toss in some white chocolate chips for a chocolate overload.
- Nutty Crunch: Stir in 1/2 cup (60g) chopped walnuts, pecans, or toasted hazelnuts for a bit of crunch and extra flavor.
- Seasonal Twist: Add 1/2 tsp cinnamon or pumpkin spice in the fall, or swap some chocolate chips for dried cranberries and macadamia nuts at the holidays.
I’ve tried adding a swirl of peanut butter or Nutella on top before baking—messy but delicious. For smaller cookies, use a 1.5-tablespoon scoop and reduce baking time by a minute or two. And if you need to avoid eggs, a flax egg works (1 tbsp ground flax + 2.5 tbsp water, let sit 5 minutes).
Serving & Storage Suggestions
These chewy rippled chocolate chip cookies are best served slightly warm, when the chocolate is still oozy and the edges are crisp. Stack them high on a pretty plate, tuck them into a cookie jar, or wrap a few in parchment and tie with string for an easy homemade gift.
- Perfect Pairings: Serve with a glass of icy cold milk, hot coffee, or a scoop of vanilla ice cream for the ultimate dessert.
- Storage: Keep cookies in an airtight container at room temperature for up to 4 days. They stay soft and chewy, but if they start to firm up, pop them in the microwave for 8-10 seconds.
- Freezing: Freeze baked cookies for up to 2 months in a zip-top bag. Or freeze unbaked dough balls—bake straight from the freezer, adding 2-3 minutes to the baking time.
- Flavor Maturation: The flavors deepen after a day, making them even more delicious (if you can resist eating them all right away!).
Honestly, I love sneaking one with my morning coffee or tucking a still-warm cookie into my kids’ lunchboxes. The leftovers (if there are any) make the BEST midnight snack.
Nutritional Information & Benefits
Each chewy rippled chocolate chip cookie (based on a batch of 18 large cookies) is approximately:
- Calories: 220
- Fat: 10g
- Carbohydrates: 31g
- Protein: 2g
- Sugar: 18g
The brown sugar gives these cookies their signature chew and a little extra iron and calcium (not a ton, but every bit helps!). Using dark chocolate chips adds antioxidants, and you can make them gluten or dairy-free with the right swaps.
Potential allergens include gluten, dairy, and eggs—see the variations for easy substitutions. As someone who tries to balance sweets with nutrition, I love that you can customize these cookies to fit your needs without sacrificing flavor or texture.
Conclusion
If you’re after the perfect homemade sweet, these chewy rippled chocolate chip cookies are the answer. They’re simple, fun, and deliver bakery-level results every single time. Whether you stick to the classic or try one of the tasty variations, you’ll have a treat that’s impossible to resist.
I love making these cookies because they remind me of cozy afternoons and laughter in the kitchen—plus, no one can ever eat just one! Don’t be afraid to play around with mix-ins or tweak the size; this recipe is forgiving and fun.
If you give these cookies a try, let me know how they turn out! Leave a comment, share your photos, and tell me your favorite mix-ins. Happy baking—and may your cookies always be chewy, rippled, and full of joy!
Frequently Asked Questions
How do I get those signature ripples in my cookies?
Bake the cookies, then carefully lift the tray and tap it firmly against the counter at the 8-minute mark (and again at 10 minutes if you want extra ripples). This collapses the cookies and creates those beautiful rippled edges.
Can I make these chewy rippled chocolate chip cookies without chilling the dough?
Yes, you can bake right away, but chilling for at least 15 minutes helps the cookies stay thicker and chewier. If you’re short on time, they’ll still taste amazing—just a bit flatter.
What’s the best way to store leftover cookies?
Keep them in an airtight container at room temperature for up to 4 days. For longer storage, freeze baked cookies or unbaked dough balls for future cravings.
Can I use different types of chocolate in this recipe?
Absolutely! Mix semi-sweet, dark, milk, or even white chocolate chips (or chunks). Feel free to add toffee bits, peanut butter chips, or your favorite mix-ins.
Are these cookies suitable for people with food allergies?
With a few swaps—like using gluten-free flour, vegan butter, and dairy-free chocolate chips—these cookies can be made allergy-friendly. Always check ingredient labels if you have food sensitivities.
Pin This Recipe!
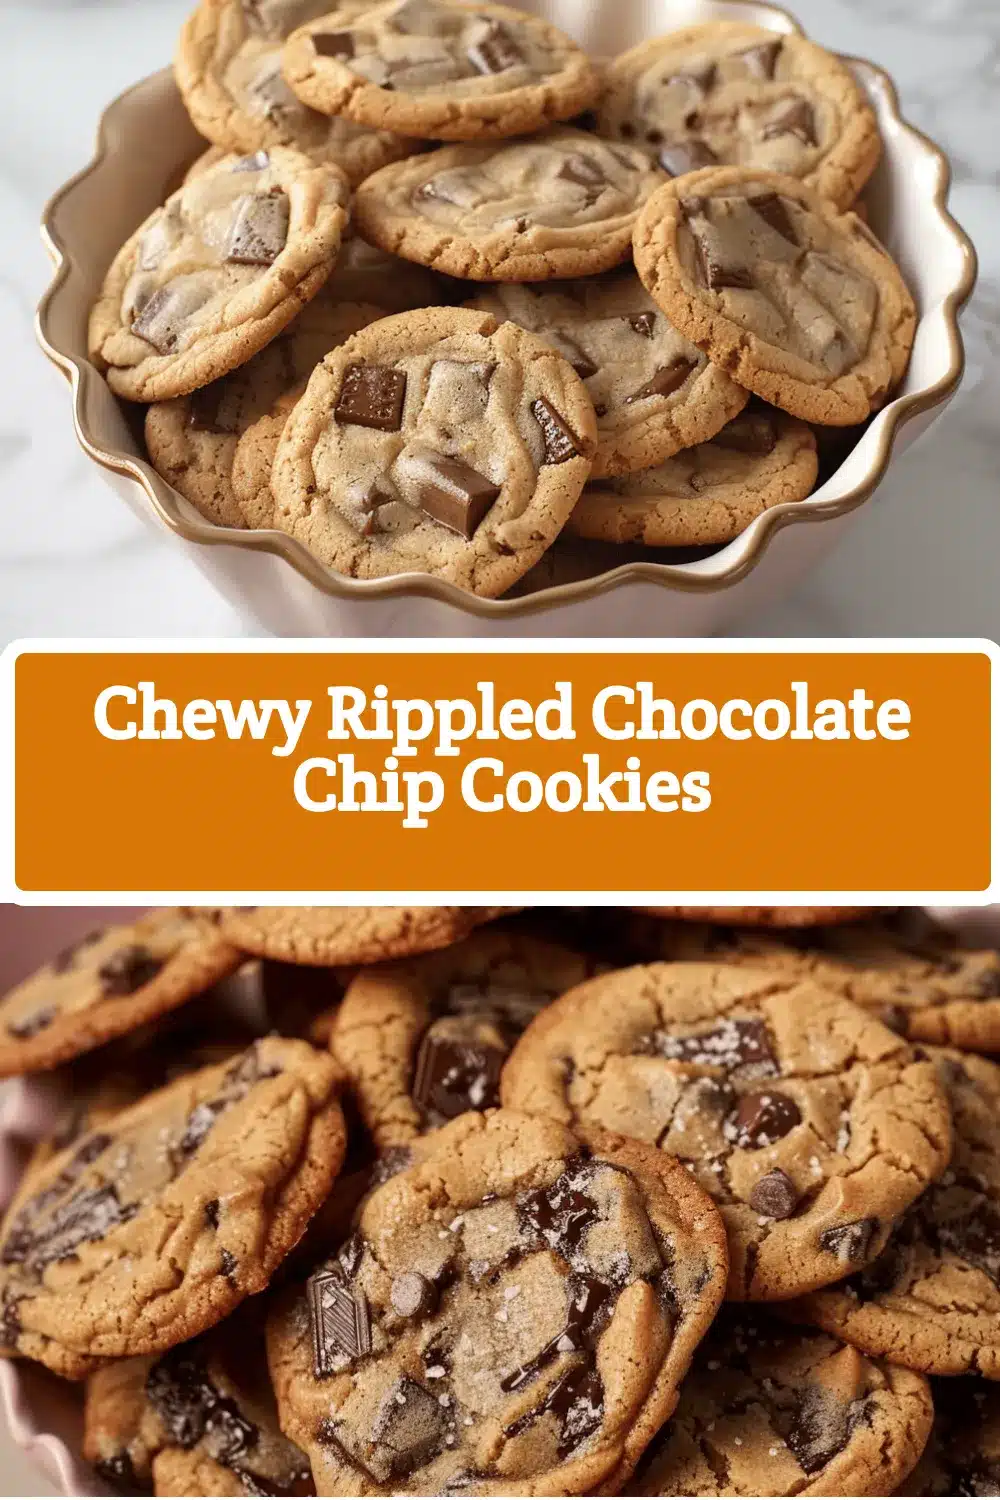
Chewy Rippled Chocolate Chip Cookies
- Total Time: 30 minutes
- Yield: 18 large cookies 1x
Description
These chewy rippled chocolate chip cookies feature gooey centers, crispy rippled edges, and melty chocolate pools. Quick and easy to make, they’re perfect for bake sales, snacks, or any sweet craving.
Ingredients
- 2 cups (250g) all-purpose flour
- 1 teaspoon (5g) baking soda
- 1/2 teaspoon (3g) kosher salt
- 3/4 cup (170g) unsalted butter, room temperature
- 1 cup (200g) brown sugar, packed (preferably dark brown)
- 1/2 cup (100g) granulated sugar
- 1 large egg, room temperature
- 2 teaspoons (10ml) vanilla extract
- 1 1/2 cups (270g) semi-sweet chocolate chips (or mix with chocolate chunks)
- Optional: Flaky sea salt, for sprinkling
Instructions
- Preheat the oven to 350°F (175°C) and position the oven rack in the center.
- Line two large baking sheets with parchment paper or silicone baking mats.
- In a medium bowl, whisk together flour, baking soda, and kosher salt. Set aside.
- In a large bowl, beat unsalted butter, brown sugar, and granulated sugar until light and fluffy (about 2-3 minutes) using a hand or stand mixer.
- Beat in the egg and vanilla extract until fully combined and creamy.
- Gradually add the dry ingredients to the wet mixture, mixing on low just until no flour streaks remain. Do not overmix.
- Fold in the chocolate chips (and nuts, if using) with a spatula. Dough will be thick and sticky.
- Chill the dough in the fridge for 15-30 minutes for thicker, chewier cookies (optional, but recommended).
- Use a 3-tablespoon scoop or large spoon to drop dough balls onto prepared baking sheets, spacing at least 3 inches apart.
- Bake one sheet at a time for 10-12 minutes. At the 8-minute mark, remove the tray and tap it firmly on the counter to create ripples. Return to oven and repeat tapping at 10 minutes if desired. Edges should be golden and centers slightly underbaked.
- Let cookies cool on the baking sheet for 5 minutes.
- Transfer cookies to a wire rack to finish cooling, or enjoy warm.
- Optional: Sprinkle with flaky sea salt while cookies are still warm.
Notes
For best ripples, tap the baking sheet firmly on the counter during baking. Chill dough for thicker cookies. Use high-quality chocolate chips for best flavor. For gluten-free or dairy-free adaptations, substitute with a 1:1 gluten-free flour blend and vegan butter/chocolate chips. Do not overmix the dough to keep cookies chewy.
- Prep Time: 15 minutes
- Cook Time: 12 minutes
- Category: Dessert
- Cuisine: American
Nutrition
- Serving Size: 1 large cookie
- Calories: 220
- Sugar: 18
- Sodium: 120
- Fat: 10
- Saturated Fat: 6
- Carbohydrates: 31
- Fiber: 1
- Protein: 2
Keywords: chocolate chip cookies, chewy cookies, rippled cookies, pan-banging cookies, homemade cookies, easy dessert, bake sale, American cookies, chocolate, sweets


