
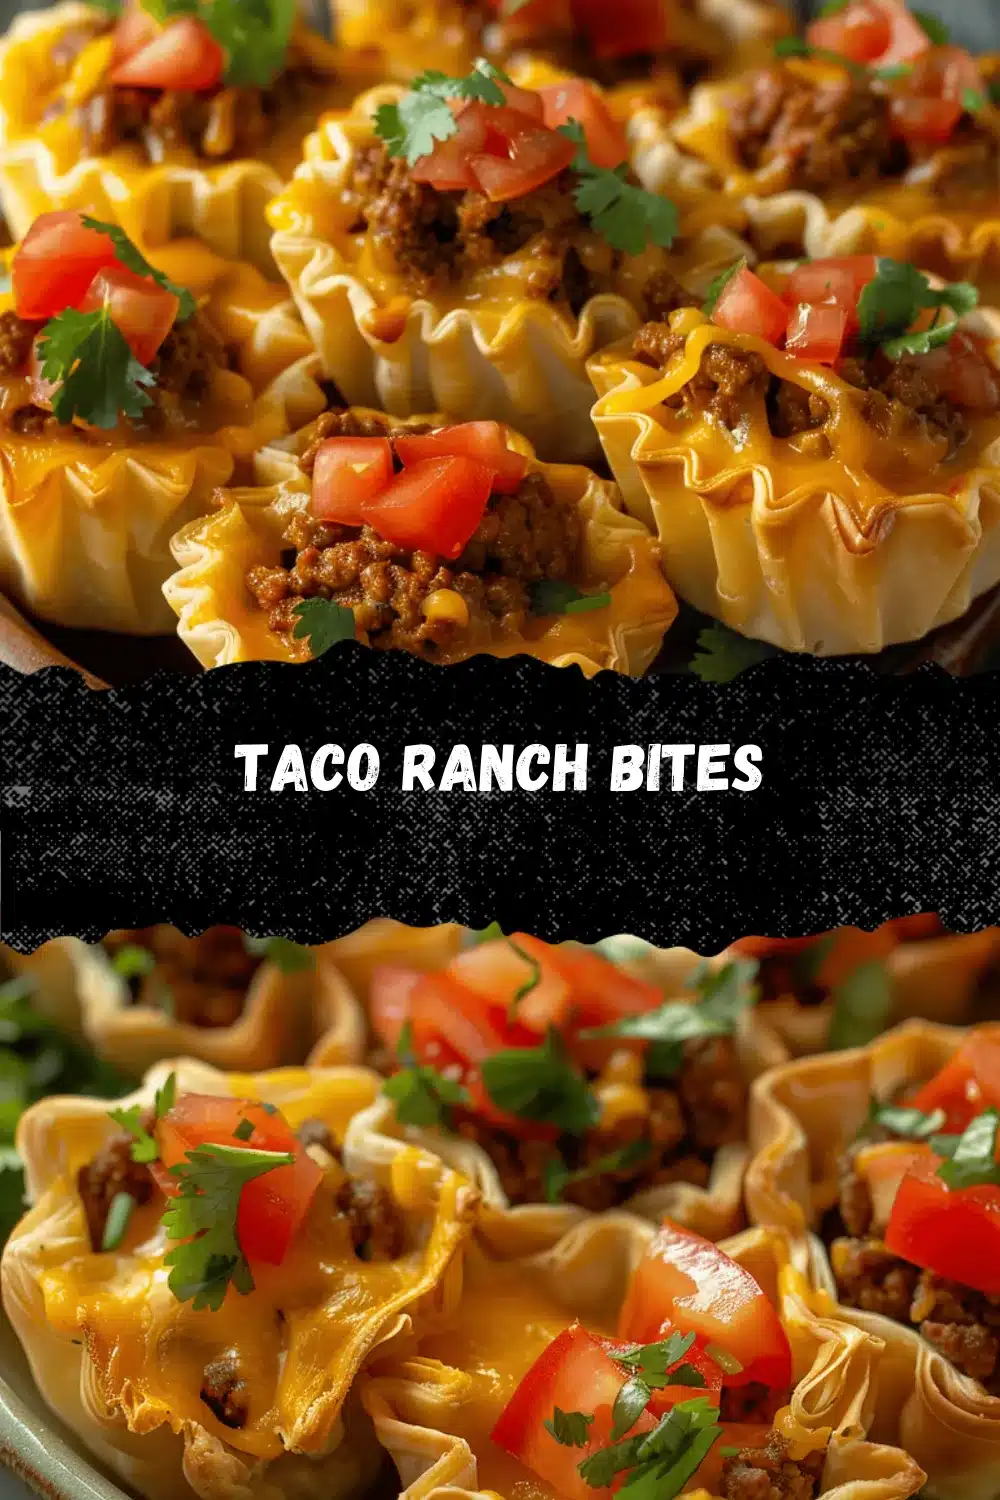
Crunchy, cheesy, and bursting with flavor—Taco Ranch Bites are that rare party snack that disappears before you even realize you’ve set them out. The first time I made these, my kitchen smelled like a Tex-Mex cantina (in the best way). The sizzle of seasoned beef, the tangy punch of ranch, and the golden crispiness of their flaky shells had everyone hovering over the tray, sneaking bites before dinner was even served. Honestly, I stumbled onto this recipe during a frantic search for something quick and crowd-pleasing for a game night. I had leftover taco meat, a packet of ranch seasoning, and half a roll of crescent dough—so, you know, necessity really is the mother of invention.
Since then, Taco Ranch Bites have become my go-to for potlucks, holiday gatherings, and pretty much any event where finger foods reign supreme. If you love classic Mexican food flavors but want them in an easy, poppable form, this is your recipe. The best part? You don’t need any wild ingredients or fancy gadgets—just a mixing bowl, a baking sheet, and a little bit of that “I-can-make-anything-delicious” attitude. Whether you’re feeding picky kids, hungry teens, or a roomful of adults, these bites check all the boxes. They taste like a cross between crispy tacos and creamy ranch dip, but with way less mess (no shells crumbling in your lap!).
I’ve tested this taco ranch bites recipe more times than I can count—tweaking the spice, swapping cheeses, even sneaking in veggies. Each batch comes out better than the last, and honestly, they rarely last more than a few minutes on the table. If you’re looking for a party appetizer that’s as fun to eat as it is to make, these Taco Ranch Bites are simply unbeatable.
Why You’ll Love This Recipe
- Quick & Easy: You can whip up a batch of Taco Ranch Bites in under 35 minutes. Perfect for last-minute guests or those “oh no, I forgot to make an appetizer” moments.
- Simple Ingredients: No need for a special trip to the market. Most of the ingredients are probably hanging out in your pantry or fridge right now.
- Perfect for Parties: These are ideal for birthday parties, Cinco de Mayo, family gatherings, or even game day spreads. They’re bite-sized, portable, and guaranteed to disappear fast.
- Crowd-Pleaser: From my own experience (and a lot of taste tests), Taco Ranch Bites get rave reviews from kids, adults, and even picky eaters who “don’t do spicy.”
- Unbelievably Delicious: The combination of savory taco meat, creamy ranch, gooey cheese, and buttery crescent dough is pure comfort in every bite.
What sets these Taco Ranch Bites apart from all the other Mexican food appetizers? For starters, the ranch seasoning brings a tangy zip that plays perfectly with the classic taco flavors—think zesty, creamy, and a little unexpected. Instead of just stuffing everything in a tortilla, you’re wrapping it all up in a warm, flaky dough that bakes to golden perfection. Plus, you can easily customize the heat level, swap in different cheeses, or add your favorite mix-ins (corn, beans, jalapeños—you name it). These are the appetizers I wish someone had brought to every party I’ve ever attended. They’re comforting, craveable, and just plain fun. And let’s face it, there’s something about finger food that brings out everyone’s playful side.
This recipe isn’t just about feeding people—it’s about making memories, sparking laughter, and (if you’re like me) sneaking a bite or two before anyone else gets the chance. Once you try these, you’ll understand why I make a double batch every time!
Ingredients Needed
This recipe uses everyday ingredients to create bold, crave-worthy flavor. Here’s what you’ll need for Taco Ranch Bites:
- Ground beef (1 lb / 450g): The hearty base. I usually go for 80/20 for flavor, but leaner works too.
- Taco seasoning (1 packet or 2 tbsp / 14g): Adds all the classic Mexican spice. I love the Trader Joe’s blend, but homemade works great.
- Ranch seasoning mix (1 packet / 30g): The secret ingredient! It gives these bites their signature tangy, creamy edge. Hidden Valley is my go-to.
- Cream cheese (4 oz / 115g, softened): This melts into the beef, making the filling rich and a little gooey.
- Shredded cheddar cheese (1 cup / 115g): For that melt-in-your-mouth texture. Pepper jack or Mexican blend also work well.
- Crescent roll dough (2 cans, 8 oz each / 450g total): Forms the crispy, buttery shell. Pillsbury is classic, but store brand is fine.
- Green onions (2, finely sliced): For a bit of color and a fresh, mild bite.
- Optional add-ins: Diced jalapeños for heat, black beans for protein, or sweet corn for crunch. I’ll sometimes toss in a handful of chopped cilantro for a little freshness.
- Cooking spray or melted butter: For brushing the tops before baking, giving that lovely golden finish.
Ingredient tips:
- If you want to make these gluten-free, grab a gluten-free refrigerated dough (like the ones by Schär or BFree).
- For a vegetarian version, swap the ground beef for cooked lentils or a plant-based ground “meat.”
- Don’t have cheddar? Monterey Jack, Colby, or even mozzarella will work in a pinch. (But cheddar gives the best flavor, trust me.)
- Prefer homemade taco seasoning? Just mix chili powder, cumin, paprika, garlic powder, onion powder, and a pinch of salt.
All of these ingredients are easy to find and affordable. That’s what I love—no weird specialty items. Just classic, reliable stuff that delivers big on flavor and texture every time.
Equipment Needed
- Large skillet or frying pan: For browning the beef and mixing the filling. Nonstick is great, but a good cast iron pan gives a nice sear.
- Mixing bowl: For combining the cooked meat with cheeses and seasonings. Medium-to-large size works best.
- Baking sheet: You’ll need a standard sheet pan or two. If you have a nonstick one, that’s even better. Parchment paper is handy for easy cleanup (I swear by it).
- Small spoon or scoop: For portioning the filling into each crescent dough square. A cookie scoop keeps things tidy.
- Sharp knife or pizza cutter: For cutting the dough into squares or triangles. I found a pizza cutter makes this super fast.
- Pastry brush: For brushing melted butter or oil over the tops before baking. Not essential, but gives the best golden finish.
- Cooling rack (optional): Helps keep the bottoms crispier if you have one on hand.
Honestly, you don’t need anything fancy. I’ve made these bites with a basic frying pan and a well-loved cookie sheet from college. If your tools are older, just line with parchment to prevent sticking. And if you don’t have a pastry brush, a folded paper towel dipped in butter works in a pinch. The most important thing is a good baking sheet and something to scoop the filling!
Preparation Method

- Preheat your oven: Set it to 375°F (190°C). Line a baking sheet with parchment paper or spray lightly with cooking spray.
- Brown the beef: Heat your skillet over medium-high. Add 1 lb (450g) ground beef. Cook, breaking it up with a spoon, until no pink remains—about 6-8 minutes. Drain excess fat.
- Season the meat: Sprinkle in 1 packet (2 tbsp / 14g) taco seasoning and 1/4 cup (60ml) water (if your seasoning calls for it). Stir to coat and simmer for 2-3 minutes. Remove from heat.
- Add the creamy goodness: While the meat is still warm, stir in 1 packet ranch seasoning (30g), 4 oz (115g) softened cream cheese, and 1 cup (115g) shredded cheddar. Mix until cheese melts and the filling is creamy. Toss in sliced green onions (save a few for garnish, if you like).
- Prepare the dough: Open 2 cans (8 oz each / 450g total) crescent roll dough. Unroll onto a lightly floured surface. Press seams to seal and cut into 24 squares or triangles—don’t worry about perfection here.
- Fill and fold: Place a heaping tablespoon of the beef mixture in the center of each square. Fold corners over to enclose the filling and pinch edges to seal (they might look rustic, and that’s okay!). Place seam side down on the baking sheet.
- Brush and bake: Brush the tops with melted butter or spray lightly with cooking spray. Bake for 12-15 minutes, or until golden brown and crisp. Keep an eye—they go from golden to too-dark fast.
- Cool and serve: Let bites cool for 5 minutes on a wire rack (or right on the tray if you’re impatient). Sprinkle with extra green onions. Serve warm, with salsa, sour cream, or ranch for dipping.
Troubleshooting tips: If your dough tears, just pinch it back together. If the filling oozes out while baking, it’s totally normal—those crispy edges are delicious. For even browning, rotate your baking sheet halfway through. I always save a few bites for myself before putting them out—otherwise, I miss out!
Cooking Tips & Techniques
- Don’t overfill: It’s tempting, but too much filling can cause the dough to burst. Stick to about 1 tablespoon per bite.
- Seal well: Pinch the dough edges tightly so the cheese doesn’t leak out (a little always does, but that’s the tasty part!).
- Let cream cheese soften: Cold cream cheese is hard to mix in. Let it sit on the counter while you cook the beef for easy blending.
- Pre-chill dough if sticky: If your kitchen is warm, pop the dough in the fridge for 10 minutes before working with it. It’s way easier to handle.
- Batch prep: Make the filling ahead and refrigerate for up to 2 days. Assemble and bake right before serving for the best texture.
- Even baking: Space the bites out by at least an inch so they brown evenly. If your oven heats unevenly, rotate the pan halfway through.
- My lesson learned: The first time I made these, I forgot to drain the beef—huge mistake! The bites turned soggy. Always drain off extra grease for the crispiest result.
- Make it pretty: A sprinkle of paprika or extra cheese on top before baking adds color and flavor.
One more tip: If you’re making a big batch, keep finished bites warm in a low oven (200°F/95°C) until ready to serve. That way, your Taco Ranch Bites are always hot and irresistible!
Variations & Adaptations
- Vegetarian Taco Ranch Bites: Swap the ground beef for cooked lentils, black beans, or a plant-based meat substitute. You get all the flavor, none of the meat.
- Spicy Kick Variation: Add 1-2 tablespoons of diced jalapeños or a dash of hot sauce to the beef mixture for those who love heat. Pepper jack cheese also brings a little fire.
- Low-Carb Version: Use low-carb tortilla wraps cut into squares instead of crescent dough. Bake until crispy for a lighter option.
- Gluten-Free Option: Choose a gluten-free refrigerated dough or make your own using a favorite gluten-free flour blend.
- Seasonal Add-Ins: In summer, I sometimes add a handful of fresh corn kernels or diced red bell pepper for a sweet crunch.
- Cheese Swap: Switch up the cheese—Monterey Jack, Colby, or a Mexican blend all work well. I once used smoked gouda and it was next-level.
- Personal twist: I love adding a tablespoon of chopped cilantro to the filling for freshness. Sometimes I’ll add a sprinkle of taco-seasoned panko on top for extra crunch.
Don’t be afraid to experiment. These Taco Ranch Bites are super forgiving, and every variation brings its own charm. Just remember to taste as you go—sometimes a little extra cheese or a squeeze of lime is all you need to make them your own.
Serving & Storage Suggestions
Serving: Taco Ranch Bites are best served warm, straight from the oven. Arrange them on a platter with little bowls of salsa, sour cream, guacamole, or even extra ranch for dipping. If you’re going for a Pinterest-worthy spread, add lime wedges, fresh cilantro, and a sprinkle of green onions for color and freshness. They make a great centerpiece for a finger food buffet or taco night appetizer board. Pair with margaritas, Mexican beer, or sparkling water with lime for a festive touch.
Storage: Store any leftovers (if you’re lucky enough to have them!) in an airtight container in the fridge for up to 3 days. To reheat, pop them in a 350°F (175°C) oven for 8-10 minutes, or air fry for 2-3 minutes—this brings back their crispness way better than microwaving. You can also freeze unbaked bites for up to a month; just thaw overnight in the fridge before baking as usual.
As the flavors sit, they meld and deepen—so sneaking a cold bite the next day isn’t the worst idea. In fact, I think they’re even better the second day!
Nutritional Information & Benefits
Each Taco Ranch Bite has roughly 120 calories, 7g fat, 9g carbs, and 6g protein (based on standard ingredients and a batch of 24 bites). They’re a great source of protein and calcium, thanks to the beef and cheese. Using lean beef or a plant-based substitute can lower the fat content. For a lighter snack, opt for low-fat cream cheese and cheese blends.
This recipe is easy to adapt for gluten-free or lower-carb diets. Common allergens: wheat (in the dough), dairy (cheese, cream cheese), and sometimes soy in seasoning blends. If you have dietary needs, just swap ingredients as needed. I love that these bites offer a little bit of everything—flavor, protein, and a touch of comfort food joy. They fit right into a balanced party spread or a fun family dinner.
Conclusion
If you’re looking for a party appetizer that’s easy, crazy-delicious, and sure to wow your friends, Taco Ranch Bites are the answer. They combine classic Mexican food flavors with the cool, creamy twist of ranch, all wrapped up in a crispy, golden shell. I love how flexible they are—you can tweak the filling, change up the cheese, or sneak in veggies for the kids. These bites have saved me at more than one last-minute gathering, and they never fail to bring smiles (and empty plates).
Give these a try, and don’t be afraid to make them your own! I’d love to hear how you customize your Taco Ranch Bites—drop a comment below, share your photos, or tag me if you post them on social media. Your feedback and twists inspire me every time. Here’s to making your next party the tastiest one yet—happy snacking!
FAQs
How far in advance can I make Taco Ranch Bites?
You can assemble them up to a day ahead, cover, and refrigerate. Bake just before serving for the best texture.
Can I freeze Taco Ranch Bites?
Yes! Freeze unbaked bites on a tray, then transfer to a bag. Thaw in the fridge overnight and bake as usual.
What are the best dipping sauces for these bites?
Salsa, sour cream, guacamole, or classic ranch all work great. I sometimes set out a trio for everyone to pick their favorite.
Can I make these vegetarian?
Absolutely—use cooked lentils, black beans, or a plant-based meat substitute instead of ground beef.
Why did my dough burst open while baking?
Overfilling is the usual culprit. Stick to about 1 tablespoon filling per bite and pinch the edges well to seal.
Pin This Recipe!

Taco Ranch Bites
- Total Time: 30 minutes
- Yield: 24 bites (about 8 servings) 1x
Description
Crunchy, cheesy, and bursting with flavor, Taco Ranch Bites are the ultimate easy Mexican-inspired party appetizer. These bite-sized snacks combine seasoned beef, creamy ranch, and gooey cheese wrapped in flaky crescent dough—perfect for any gathering.
Ingredients
- 1 lb ground beef
- 1 packet (2 tbsp) taco seasoning
- 1 packet (about 1 oz) ranch seasoning mix
- 4 oz cream cheese, softened
- 1 cup shredded cheddar cheese
- 2 cans (8 oz each) crescent roll dough
- 2 green onions, finely sliced
- Cooking spray or melted butter for brushing
- Optional: diced jalapeños, black beans, sweet corn, chopped cilantro
Instructions
- Preheat oven to 375°F (190°C). Line a baking sheet with parchment paper or spray lightly with cooking spray.
- Heat a large skillet over medium-high heat. Add ground beef and cook, breaking it up, until no pink remains (about 6-8 minutes). Drain excess fat.
- Add taco seasoning and 1/4 cup water (if seasoning calls for it). Stir to coat and simmer for 2-3 minutes. Remove from heat.
- Stir in ranch seasoning, softened cream cheese, and shredded cheddar while the meat is still warm. Mix until cheese melts and filling is creamy. Add sliced green onions (reserve some for garnish if desired).
- Unroll crescent dough onto a lightly floured surface. Press seams to seal and cut into 24 squares or triangles.
- Place a heaping tablespoon of beef mixture in the center of each dough piece. Fold corners over to enclose filling and pinch edges to seal. Place seam side down on the baking sheet.
- Brush tops with melted butter or spray lightly with cooking spray.
- Bake for 12-15 minutes, or until golden brown and crisp. Rotate baking sheet halfway through for even browning.
- Let bites cool for 5 minutes on a wire rack or tray. Sprinkle with extra green onions and serve warm with salsa, sour cream, or ranch for dipping.
Notes
Don’t overfill the dough to prevent bursting. Pinch edges tightly to seal. For a vegetarian version, use lentils or plant-based meat. Make ahead: assemble up to a day in advance and bake before serving. Store leftovers in the fridge for up to 3 days and reheat in the oven or air fryer for best crispness. Freeze unbaked bites for up to a month.
- Prep Time: 15 minutes
- Cook Time: 15 minutes
- Category: Appetizer
- Cuisine: Mexican
Nutrition
- Serving Size: 1 bite
- Calories: 120
- Sugar: 1
- Sodium: 290
- Fat: 7
- Saturated Fat: 3
- Carbohydrates: 9
- Protein: 6
Keywords: taco ranch bites, Mexican appetizer, party snack, crescent roll bites, easy appetizer, finger food, ranch, taco, beef, cheese, game day, potluck, kid friendly


